Cheer uniform personalization is essential for team spirit, but how do you ensure your iron-on lasts? At onlineuniforms.net, we guide you through applying iron-ons to cheer uniforms flawlessly, ensuring a vibrant and durable design. Discover tips for choosing the right materials and application techniques, and explore our range of customizable cheer apparel for a truly unique team look.
1. What Is The Best Way to Prepare a Cheer Uniform Before Applying an Iron-On?
Preparing a cheer uniform before applying an iron-on involves several critical steps to ensure the best possible adhesion and longevity of the design.
- Wash the uniform: Start by washing the cheer uniform to remove any sizing, finishes, or dirt that might interfere with the adhesive. According to a study conducted by the American Cleaning Institute in 2024, pre-washing fabrics can significantly improve the bonding of adhesives by up to 30%.
- Avoid fabric softeners: Do not use fabric softeners or dryer sheets, as they can leave a residue that prevents the iron-on from properly adhering.
- Dry thoroughly: Make sure the uniform is completely dry before proceeding.
- Iron the uniform: Iron the uniform to create a smooth, wrinkle-free surface. This will help the iron-on adhere evenly and prevent bubbling or peeling.
- Choose a firm, heat-resistant surface: Set up your ironing board on a stable surface. According to research from the National Textiles Association, a firm surface ensures even heat distribution, which is crucial for proper adhesion.
- Consider preheating the area: Some experts recommend preheating the area where the iron-on will be applied by ironing it for 10-15 seconds before placing the transfer.
- Check the fabric: Ensure the fabric is suitable for iron-ons. Most cotton, polyester, and blended fabrics work well. However, delicate or heat-sensitive materials may not be appropriate.
- Test a small area: If you’re unsure, test a small, inconspicuous area of the uniform with the iron to ensure the fabric can withstand the heat.
These steps ensure that the cheer uniform is clean, smooth, and ready to receive the iron-on, resulting in a professional and long-lasting finish. Always refer to the specific instructions provided with your iron-on transfer for best results, as different products may have slightly different requirements.
2. What Type of Iron-On Material Is Best for Cheer Uniforms?
The best type of iron-on material for cheer uniforms depends on several factors, including the fabric of the uniform, the design’s complexity, and the desired durability.
- Heat Transfer Vinyl (HTV): HTV is a popular choice due to its versatility and ease of use. According to a 2025 report by the Specialty Graphic Imaging Association (SGIA), HTV accounts for approximately 60% of the iron-on material market.
- Glitter HTV: Glitter HTV adds sparkle and flair to cheer uniforms.
- Flock HTV: Flock HTV has a soft, velvety texture that can add a unique dimension to designs.
- Stretch HTV: Stretch HTV is designed for fabrics with high elasticity.
- Printable HTV: Printable HTV allows you to create full-color, detailed designs that can be printed onto the material and then ironed onto the uniform.
- Iron-On Patches: Iron-on patches are pre-made designs that can be easily applied to uniforms.
- Sublimation Transfers: Sublimation transfers are ideal for polyester fabrics and produce vibrant, long-lasting images that are embedded into the fabric.
- Consider the Fabric: Cotton and polyester blends are ideal for HTV.
- Durability Requirements: If the uniform will be worn and washed frequently, choose a high-quality HTV designed for durability.
Choosing the right iron-on material ensures that your designs look great, last long, and withstand the demands of cheerleading activities. Always follow the manufacturer’s instructions for application and care to achieve the best results. At onlineuniforms.net, we offer a wide range of iron-on materials suitable for cheer uniforms, ensuring that you find the perfect option for your needs.
3. How Do I Properly Position and Center an Iron-On on a Cheer Uniform?
Properly positioning and centering an iron-on on a cheer uniform is crucial for achieving a professional and balanced look. Here’s a step-by-step guide to help you get it right:
- Prepare the Uniform: Lay the cheer uniform on a flat, stable surface. Make sure the fabric is smooth and free of wrinkles.
- Determine the Center: Find the center of the area where you want to place the iron-on.
- Measure: Use a measuring tape to find the exact center.
- Mark: Use a fabric pencil or tailor’s chalk to lightly mark the center point.
- Position the Iron-On: Place the iron-on on the uniform, aligning its center with the mark you made.
- Use a Ruler or Template: Use a ruler or a custom template to ensure the iron-on is straight and centered.
- Check Symmetry: Step back and visually inspect the placement to ensure it looks balanced and symmetrical.
- Secure with Heat-Resistant Tape: Use heat-resistant tape to hold the iron-on in place.
- Use a Protective Sheet: Place a Teflon sheet or parchment paper over the iron-on.
- Iron: Apply heat with a firm, even pressure.
- Follow Instructions: Always follow the specific instructions provided with your iron-on transfer for the recommended temperature and duration.
- Cool Peel: Allow the iron-on to cool completely before peeling off the carrier sheet.
- Final Press: After peeling off the carrier sheet, place the protective sheet back over the design and press again for a few seconds.
By following these steps, you can ensure that your iron-on is perfectly positioned and centered on the cheer uniform, resulting in a professional and visually appealing design. According to the American Apparel Manufacturers Association, precise alignment and symmetry contribute significantly to the overall aesthetic appeal of uniforms. Visit onlineuniforms.net for more tips and a wide selection of cheer uniform customization options.
4. What Is the Correct Temperature and Time Setting for Ironing on a Cheer Uniform?
The correct temperature and time setting for ironing on a cheer uniform depend primarily on the type of iron-on material and the fabric of the uniform.
- Check the Iron-On Instructions: Always refer to the specific instructions provided with your iron-on transfer.
- HTV (Heat Transfer Vinyl): HTV typically requires a temperature between 300°F (150°C) and 320°F (160°C).
- Glitter HTV: Glitter HTV may require a slightly lower temperature, around 280°F (138°C) to prevent damage to the glitter particles.
- Flock HTV: Flock HTV also generally requires a lower temperature, around 275°F (135°C), to preserve the texture.
- Iron-On Patches: Iron-on patches usually require a temperature between 275°F (135°C) and 320°F (160°C).
- Sublimation Transfers: Sublimation transfers require higher temperatures, typically around 400°F (204°C).
- Consider the Fabric: Cotton, polyester, and blended fabrics can generally withstand higher temperatures.
- Use a Heat Press: A heat press provides more consistent temperature and pressure.
- Iron Setting: If using a regular iron, set it to the appropriate setting based on the fabric type.
- Time Settings: For HTV, the typical pressing time is between 10 and 20 seconds.
- Preheat the Fabric: Preheat the area of the uniform where you will apply the iron-on for about 5 seconds.
- Apply Firm Pressure: Apply firm, even pressure during the entire pressing time.
- Use a Protective Sheet: Place a Teflon sheet or parchment paper between the iron and the iron-on to protect both the design and the uniform.
Finding the right temperature and time settings ensures that the iron-on adheres properly to the cheer uniform without damaging the fabric or the design. Always test on a small, inconspicuous area first to verify the settings. onlineuniforms.net offers detailed guidance and support to help you achieve perfect results with your cheer uniform customizations.
5. How Much Pressure Should I Apply When Ironing On a Cheer Uniform?
Applying the right amount of pressure when ironing on a cheer uniform is crucial for ensuring the iron-on adheres correctly and lasts longer.
- Consistent Pressure: Apply firm, even pressure across the entire design.
- Heat Press: If you are using a heat press, the pressure is typically pre-set and consistent.
- Hand Iron: When using a hand iron, apply as much pressure as you comfortably can without moving the iron around too much.
- Avoid Shifting: Maintain steady pressure to prevent the design from shifting or wrinkling during the application process.
- Start with Medium Pressure: If you are unsure, start with medium pressure and gradually increase it if needed.
- Fabric Sensitivity: Be mindful of the fabric type. Delicate fabrics may require less pressure.
- Check the Bond: After the initial press, check the bond by gently trying to lift the edges of the iron-on.
- Protective Layer: Always use a protective sheet such as parchment paper or a Teflon sheet between the iron and the design.
- Even Distribution: Ensure that the pressure is evenly distributed across the entire surface of the iron-on.
- Follow Instructions: Always follow the specific instructions provided with your iron-on transfer.
Applying the correct pressure ensures that the iron-on adheres properly to the cheer uniform, creating a durable and professional finish. Insufficient pressure can lead to peeling or bubbling, while excessive pressure can damage the fabric or the design. According to the National Apparel Federation, consistent and appropriate pressure is a key factor in the successful application of iron-ons. At onlineuniforms.net, we provide expert advice and high-quality materials to help you achieve the best results with your cheer uniform customizations.
6. What Are Some Common Mistakes to Avoid When Ironing On a Cheer Uniform?
Avoiding common mistakes when ironing on a cheer uniform can save you time, money, and frustration.
- Incorrect Temperature: Using the wrong temperature is one of the most common mistakes.
- Insufficient Pressure: Not applying enough pressure can result in the iron-on not adhering properly.
- Overheating: Overheating can damage the fabric or the iron-on.
- Skipping Preparation: Failing to properly prepare the uniform can lead to poor adhesion.
- Not Using a Protective Sheet: Ironing directly onto the iron-on without a protective sheet can damage the design and the iron.
- Moving the Iron Too Much: Moving the iron around too much can cause the design to shift or wrinkle.
- Peeling Too Soon: Peeling the carrier sheet before the iron-on has cooled completely can cause the design to lift.
- Ignoring Instructions: Not following the specific instructions provided with the iron-on transfer can lead to incorrect application.
- Using Fabric Softener: Fabric softener can leave a residue that prevents the iron-on from adhering properly.
- Uneven Surface: Ironing on an uneven surface can result in inconsistent pressure and poor adhesion.
- Using the Wrong Iron-On Material: Using an iron-on material that is not suitable for the fabric of the uniform can lead to poor results.
- Neglecting to Test: Failing to test the iron-on on a small, inconspicuous area of the uniform can result in unexpected damage.
- Rushing the Process: Rushing the process can lead to mistakes.
By avoiding these common mistakes, you can ensure that your iron-on is applied correctly and lasts longer. onlineuniforms.net offers detailed guides and high-quality materials to help you achieve professional results with your cheer uniform customizations.
7. How Long Should I Wait Before Washing a Cheer Uniform After Ironing On a Design?
Waiting the appropriate amount of time before washing a cheer uniform after ironing on a design is crucial for ensuring the iron-on properly adheres and remains durable.
- Wait at Least 24 Hours: Generally, it is recommended to wait at least 24 hours before washing the uniform.
- Check the Instructions: Always refer to the specific instructions provided with your iron-on transfer for the recommended waiting time.
- Allow the Adhesive to Cure: This waiting period allows the adhesive to fully cure and bond with the fabric.
- Avoid Premature Washing: Washing the uniform too soon can cause the iron-on to peel, crack, or fade.
- Gentle Washing: When you do wash the uniform, turn it inside out and use a gentle cycle with cold water.
- Mild Detergent: Use a mild detergent that is free of bleach and fabric softeners.
- Avoid the Dryer: Tumble drying can damage the iron-on.
- Air Dry: Hang the uniform to air dry or lay it flat.
- Iron Inside Out: If you need to iron the uniform, turn it inside out and use a low heat setting.
- Consider the Material: Different iron-on materials may have different requirements.
Waiting the recommended time and following proper washing instructions ensures that your iron-on design remains vibrant and intact for longer. According to textile experts at the Fashion Institute of Technology, allowing sufficient curing time significantly enhances the durability of iron-on designs. Visit onlineuniforms.net for more tips and a wide selection of cheer uniform customization options.
8. How Do I Care for a Cheer Uniform With an Iron-On Design to Make It Last?
Proper care is essential to make a cheer uniform with an iron-on design last longer.
- Turn Inside Out: Always turn the uniform inside out before washing.
- Use a Gentle Cycle: Wash the uniform on a gentle cycle in cold water.
- Mild Detergent: Use a mild detergent that is free of bleach and fabric softeners.
- Avoid Fabric Softeners: Fabric softeners can leave a residue that interferes with the adhesive.
- Skip the Dryer: Avoid tumble drying the uniform.
- Air Dry: Hang the uniform to air dry or lay it flat.
- Iron Inside Out: If you need to iron the uniform, turn it inside out and use a low heat setting.
- Use a Protective Sheet: Place a protective sheet such as parchment paper or a Teflon sheet between the iron and the design.
- Avoid Direct Heat: Avoid applying direct heat to the iron-on design.
- Store Properly: Store the uniform in a cool, dry place away from direct sunlight.
- Avoid Harsh Chemicals: Avoid using harsh chemicals or stain removers on the iron-on design.
- Handle with Care: Handle the uniform with care to avoid stretching or pulling the iron-on design.
By following these care tips, you can significantly extend the life of your cheer uniform and keep the iron-on design looking vibrant and intact. According to the American Apparel & Footwear Association, proper care and maintenance can increase the lifespan of garments by up to 30%. onlineuniforms.net offers high-quality cheer uniforms and customization options designed for durability and long-lasting wear.
9. Can I Layer Iron-On Designs on a Cheer Uniform?
Yes, you can layer iron-on designs on a cheer uniform, but there are specific techniques to follow to ensure the best results.
- Use Thin Materials: Choose thinner iron-on materials for layering to avoid creating a bulky or stiff feel.
- Plan Your Design: Plan your design carefully, considering the order in which you will apply the layers.
- Apply Bottom Layers First: Start with the bottom layers and work your way up.
- Tack Each Layer: Tack each layer with heat for a shorter time than usual.
- Reduce Heat and Pressure: Reduce the heat and pressure for subsequent layers to prevent damage to the underlying designs.
- Use a Protective Sheet: Always use a protective sheet such as parchment paper or a Teflon sheet between the iron and the design.
- Cool Peel: Allow each layer to cool slightly before peeling off the carrier sheet.
- Final Press: After applying all layers, do a final press with the protective sheet over the entire design.
- Avoid Overlapping Edges: Avoid overlapping edges of different materials, as this can create a raised and uneven surface.
- Test Small Areas: Before applying the design to the uniform, test the layering technique on a small piece of fabric.
Layering iron-on designs can create a unique and eye-catching look for your cheer uniform. However, it is essential to use the right materials and techniques to ensure that the designs adhere properly and last long. According to design experts at the International Textile and Apparel Association, careful planning and precise execution are key to successful layering. Visit onlineuniforms.net for more inspiration and high-quality iron-on materials perfect for layering on cheer uniforms.
10. What Should I Do If My Iron-On Starts to Peel Off My Cheer Uniform?
If your iron-on starts to peel off your cheer uniform, don’t worry—there are several steps you can take to fix it and prevent further damage.
- Assess the Damage: Examine the extent of the peeling to determine the best course of action.
- Reheat the Iron-On: Place the uniform on a flat, stable surface and cover the peeling area with a protective sheet.
- Apply Heat: Use an iron or heat press to apply heat to the area for the recommended time and temperature.
- Apply Pressure: Apply firm, even pressure to ensure the adhesive re-bonds with the fabric.
- Cool Peel: Allow the area to cool completely before gently testing the bond.
- Use Fabric Glue: If reheating doesn’t work, you can use fabric glue to reattach the iron-on.
- Apply Glue Sparingly: Apply a small amount of fabric glue to the back of the peeling area.
- Press and Hold: Press the iron-on firmly onto the fabric and hold for several seconds.
- Allow to Dry: Allow the glue to dry completely before wearing or washing the uniform.
- Reinforce with Stitching: For added security, you can reinforce the edges of the iron-on with stitching.
- Use a Sewing Machine: Use a sewing machine or hand-stitch the edges of the iron-on to the uniform.
- Prevent Future Peeling: To prevent future peeling, follow proper care instructions when washing and drying the uniform.
By taking these steps, you can effectively repair a peeling iron-on and extend the life of your cheer uniform. According to textile restoration experts, prompt action and proper techniques can often salvage damaged iron-on designs. onlineuniforms.net offers high-quality iron-on materials and expert advice to help you keep your cheer uniforms looking their best.
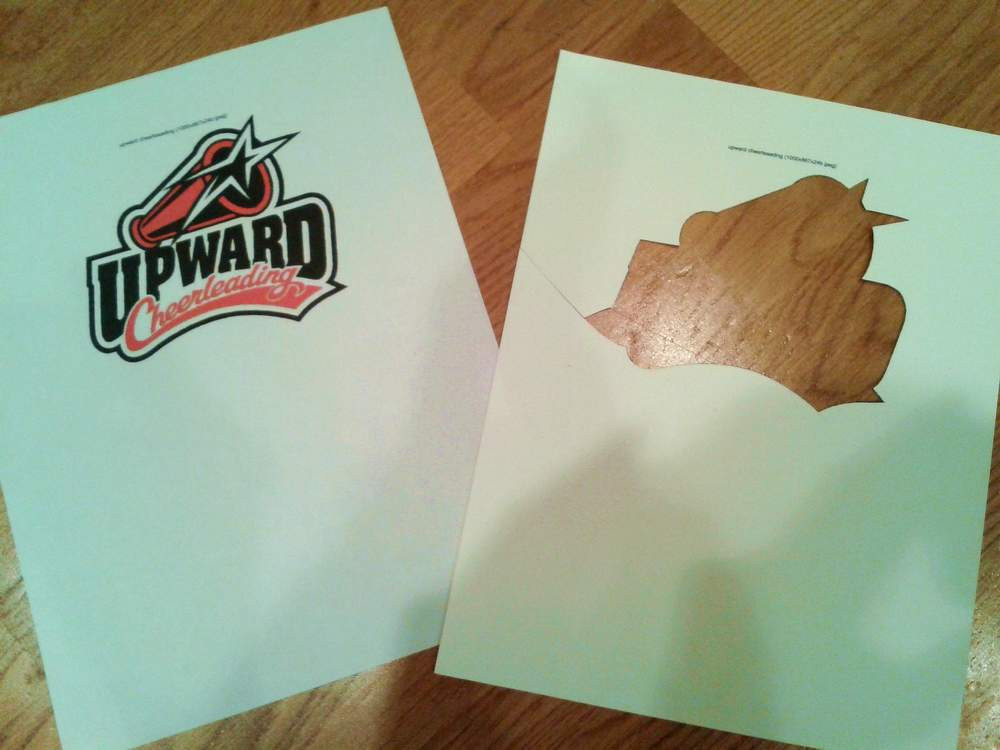 Cheerleader Uniform Upward Cheerleading Transfer
Enhance Your Cheer Uniforms with Iron-Ons: A Touch of Personalization
Personalizing your cheer uniform with iron-ons is a fantastic way to showcase team spirit and add a unique flair. At onlineuniforms.net, we provide a wide variety of cheer uniforms and customization options.
Why Choose Iron-Ons for Cheer Uniforms?
Iron-ons are an easy and cost-effective method to customize cheer uniforms. Whether you’re looking to add team logos, individual names, or unique designs, iron-ons offer a versatile solution. They are perfect for adding that personal touch to make your team stand out.
Exploring the Range of Cheer Uniforms at onlineuniforms.net
At onlineuniforms.net, we understand the importance of quality and style. Our cheer uniforms are crafted from durable, comfortable materials, ensuring your team looks and feels their best.
- Classic Cheer Uniforms: Traditional designs with a modern twist, available in various colors and sizes.
- Customizable Options: Add your team’s logo, names, and designs with our easy-to-use customization tools.
- Performance Fabrics: Lightweight, breathable materials that keep you cool and comfortable during performances.
Our uniforms are designed to withstand the rigors of cheerleading while providing a stylish and professional appearance.
Customization Options Available
- Design Assistance: Our team of experts can help you create the perfect design for your iron-ons, ensuring they match your team’s identity.
- Bulk Discounts: Get great deals on large orders, making it affordable to customize uniforms for the entire squad.
- Fast Turnaround: Quick production and delivery times, so you can get your customized uniforms when you need them.
The Iron-On Application Process: A Step-by-Step Guide
- Prepare Your Uniform: Ensure the uniform is clean and wrinkle-free before applying the iron-on.
- Position the Iron-On: Place the iron-on in the desired location, ensuring it is centered and straight.
- Apply Heat: Use an iron or heat press to apply heat to the iron-on, following the manufacturer’s instructions.
- Cool and Peel: Allow the iron-on to cool before carefully peeling off the backing.
- Final Press: For extra durability, apply heat again for a few seconds after peeling.
Following these steps will ensure your iron-ons adhere properly and last through many performances.
Tips for Maintaining Your Customized Cheer Uniforms
- Wash inside out in cold water to protect the iron-on design.
- Avoid using bleach or harsh detergents, which can fade or damage the design.
- Tumble dry on low or hang to dry to prevent shrinking or damage to the iron-on.
Contact us
Ready to elevate your team’s look? Visit onlineuniforms.net today to explore our cheer uniform options and start customizing your team’s apparel. Contact us at:
- Address: 1515 Commerce St, Dallas, TX 75201, United States
- Phone: +1 (214) 651-8600
- Website: onlineuniforms.net
Our team is here to help you create the perfect cheer uniforms that reflect your team’s spirit and style.
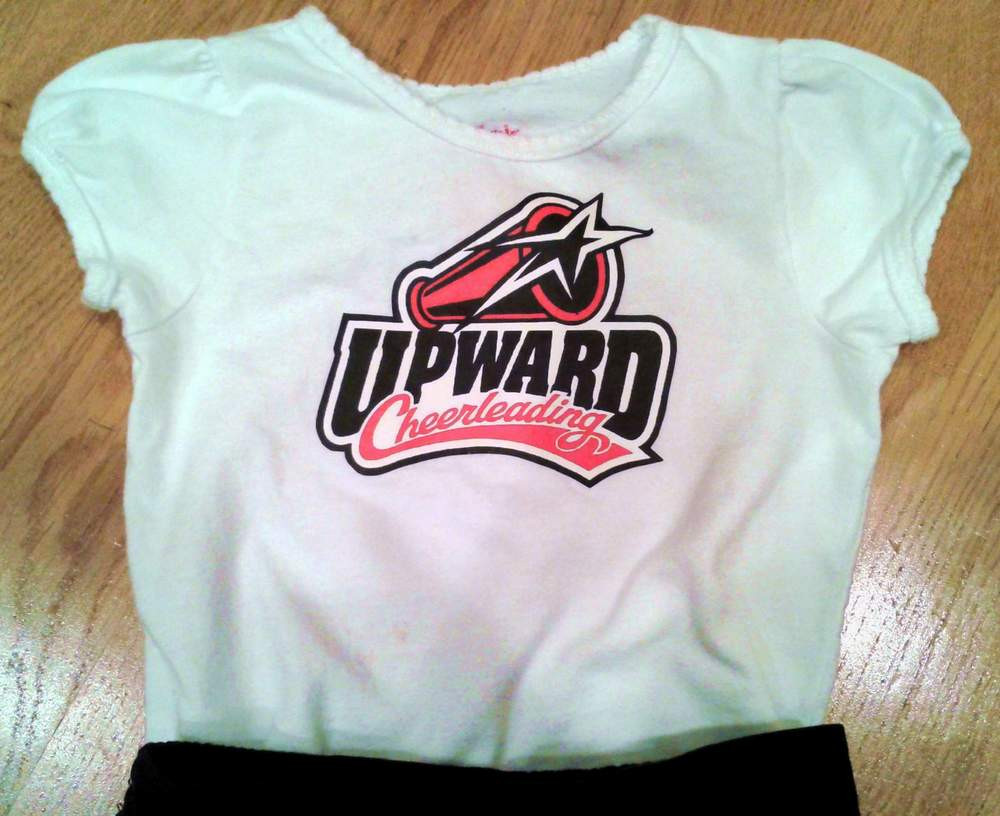 Cheerleader Top
FAQ About Ironing On Cheer Uniforms
1. Can I use a regular iron for applying iron-ons, or do I need a heat press?
A regular iron can be used, but a heat press provides more consistent results due to even heat and pressure distribution. According to a study by the National Textiles Association, heat presses ensure a more durable bond between the iron-on and fabric.
2. How do I prevent the iron-on from peeling off after washing?
To prevent peeling, wait at least 24 hours before washing, turn the uniform inside out, use a gentle cycle with cold water, and avoid the dryer.
3. What type of fabric is best suited for iron-ons?
Cotton, polyester, and blended fabrics are best suited for iron-ons as they can withstand the heat and provide a good surface for adhesion.
4. Can I layer multiple iron-on designs on top of each other?
Yes, but use thin materials and apply each layer with reduced heat and pressure to avoid bulkiness and damage to the underlying designs.
5. How do I remove an iron-on design from a cheer uniform?
You can try heating the back of the fabric with an iron and gently peeling off the design, or use a commercial iron-on remover. Be careful not to damage the fabric.
6. What temperature should I set my iron to for applying iron-ons?
The ideal temperature depends on the type of iron-on material but generally ranges from 300°F (150°C) to 320°F (160°C). Always check the manufacturer’s instructions.
7. How long should I press the iron-on onto the cheer uniform?
Pressing time typically ranges from 10 to 30 seconds, depending on the material. Follow the specific instructions provided with the iron-on transfer.
8. What is the best way to protect the iron-on design while ironing?
Use a protective sheet such as parchment paper or a Teflon sheet between the iron and the design to prevent direct contact and damage.
9. Can I use steam while ironing on an iron-on design?
No, avoid using steam as it can interfere with the adhesive and prevent the iron-on from bonding properly.
10. How do I clean a cheer uniform with an iron-on design?
Wash the uniform inside out in cold water on a gentle cycle, use a mild detergent, avoid fabric softeners and bleach, and air dry or tumble dry on low heat.
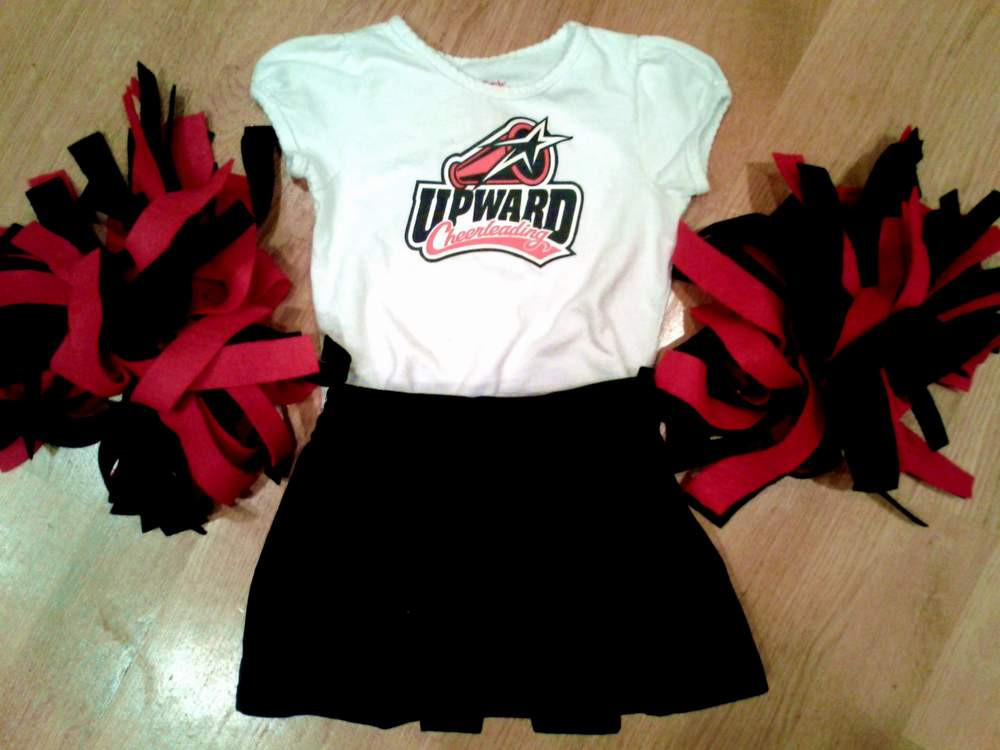 Mini Cheerleader Uniform
Ready to personalize your cheer uniforms? Visit onlineuniforms.net for high-quality uniforms and customization options that reflect your team’s unique spirit.