Are you looking for ways to remove uniform patches? Removing uniform patches can be a delicate task, but onlineuniforms.net is here to guide you through the process. Our goal is to provide you with effective methods to remove patches without causing damage to your garments, ensuring they maintain their professional appearance. With our expert advice, you can confidently tackle this task, whether you’re dealing with sewn-on or iron-on patches. For the best selection of high-quality uniforms and customization options, visit onlineuniforms.net and explore our range of work apparel, custom embroidery, and logo design services.
1. Understanding the Basics of Uniform Patch Removal
Removing patches from uniforms is a common need, whether it’s to update branding, transfer a patch to a new garment, or simply remove an unwanted emblem. The key to a successful patch removal lies in understanding the type of patch attachment and the fabric of your uniform. According to the Uniform Manufacturers and Distributors Association (UMDA), proper patch removal techniques can extend the life of your uniforms and save costs on replacements.
1.1. Identifying the Attachment Method
The first step in removing a uniform patch is to identify how it was attached. Patches are typically attached in one of two ways:
- Sewn-On Patches: These are the most common and are attached using thread.
- Iron-On Patches: These patches use a heat-activated adhesive to bond to the fabric.
Sometimes, patches may be both sewn and ironed on for extra security. Identifying the attachment method will determine the tools and techniques you’ll need.
1.2. Assessing the Fabric Type
The type of fabric your uniform is made of is crucial in determining the safest removal method. Different fabrics react differently to heat and stress. For example:
- Delicate Fabrics: Such as silk or thin synthetics, require extra care to avoid tearing or damage.
- Durable Fabrics: Like cotton or heavy-duty blends, can withstand more rigorous removal methods.
Always check the care label on your uniform to understand the fabric composition and any specific care instructions.
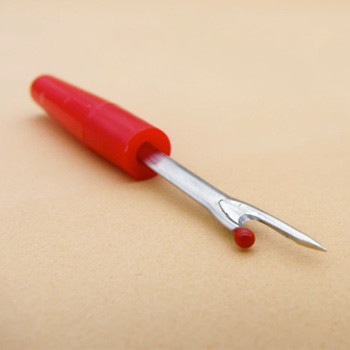 Close up of seam ripper removing stitches from uniform patch
2. Essential Tools for Patch Removal
Having the right tools on hand will make the patch removal process smoother and more efficient. Here are some essentials:
2.1. Seam Ripper
A seam ripper is your primary tool for removing sewn-on patches. Its sharp, U-shaped blade is designed to cut through stitches without damaging the surrounding fabric.
2.2. Tweezers
Tweezers are useful for picking out small bits of thread and adhesive residue left behind after removing the patch.
2.3. Small Scissors
Small, sharp scissors can help trim loose threads and make precise cuts when needed.
2.4. Clothing Iron
A clothing iron is necessary for removing iron-on patches. It helps to soften the adhesive, making it easier to peel off the patch.
2.5. Wax Paper or Cloth
Wax paper or a thin cloth is used to protect the fabric when applying heat to iron-on patches.
2.6. Cleaning Solution
A mild cleaning solution or stain remover can help remove any remaining adhesive residue or marks left by the patch.
3. Step-by-Step Guide to Removing Sewn-On Patches
Removing sewn-on patches requires patience and a steady hand. Follow these steps to ensure a clean removal:
3.1. Preparing the Area
- Turn the Garment Inside Out: This will give you better access to the back of the patch and the stitches.
- Flatten the Fabric: Lay the garment on a flat surface and smooth out the fabric around the patch to expose the stitches.
3.2. Cutting the Stitches
- Insert the Seam Ripper: Carefully insert the long tip of the seam ripper behind a stitch.
- Push the Blade: Gently push the curving blade against the stitch to cut it.
- Work Slowly: Avoid cutting the underlying fabric by working slowly and carefully.
- Cut Every Stitch: Instead of pulling out multiple stitches after making one cut, cut each stitch individually. This reduces the chance of forming wide holes in the fabric.
3.3. Removing the Patch
- Lift the Patch: After all the stitches are cut, gently lift the patch away from the fabric.
- Remove Stray Threads: Use tweezers and small scissors to clean off any bits of stray threads stuck in the fabric.
3.4. Cleaning and Finishing
- Wash the Garment: Wash the clothing, hat, or bag according to its fabric directions. This should diminish the appearance of old stitch holes.
- Iron the Area: Iron the area to help the fabric relax and further reduce the visibility of any remaining marks.
4. Removing Iron-On Patches: A Detailed Approach
Removing iron-on patches requires a different approach, as you need to soften the adhesive before peeling off the patch.
4.1. Preparing the Iron and Fabric
- Set Up the Iron: Set up an iron and ironing board or cover a flat surface with a towel.
- Test the Fabric: Test how the fabric under the patch reacts to heat by placing a piece of wax paper over the fabric in an inconspicuous area and pressing a hot iron onto it for 15 seconds. Inspect the fabric for heat damage.
4.2. Applying Heat to Soften the Adhesive
- Cover the Patch: Put a sheet of wax paper or a thin cloth over the patch to protect the fabric from direct heat.
- Press the Iron: Press a hot iron over the covered patch for 15-30 seconds, depending on the fabric and adhesive strength.
- Check the Adhesive: Using tweezers, gently pry up a corner of the patch to see if the adhesive has softened. If the glue remains hard, cover the patch and heat again.
4.3. Peeling Off the Patch
- Lift the Patch: Once the adhesive is soft, carefully lift off the patch.
- Work Slowly: If the patch is still difficult to remove, apply more heat and try again. Avoid pulling forcefully, as this can damage the fabric.
4.4. Removing Residue and Cleaning
- Remove Residue: Use a clean cloth and a mild adhesive remover (such as Goo Gone) to gently rub away any remaining adhesive residue.
- Wash the Fabric: Wash the fabric to remove any lingering residue and cleaning solution.
5. Dealing with Patches That Are Both Sewn and Ironed On
Some patches are attached using both sewing and adhesive methods. In these cases, it’s best to start by removing the stitches and then proceed with the iron-on patch removal method.
5.1. Removing the Stitches First
Follow the steps outlined in Section 3 to carefully remove all the stitches around the patch.
5.2. Applying Heat to the Adhesive
After removing the stitches, follow the steps in Section 4 to apply heat and soften the adhesive before peeling off the patch.
6. Preventing Damage During Patch Removal
Preventing damage to your uniform during patch removal is crucial. Here are some tips to minimize the risk:
6.1. Use the Right Tools
Using the correct tools, such as a sharp seam ripper and small scissors, will help you make precise cuts and avoid tearing the fabric.
6.2. Work Slowly and Carefully
Rushing the process can lead to mistakes and damage. Take your time and focus on each step.
6.3. Test Heat Sensitivity
Always test how the fabric reacts to heat before applying it to the entire patch. This will help you avoid melting or scorching the fabric.
6.4. Avoid Pulling Forcefully
If a patch is difficult to remove, don’t pull forcefully. Instead, apply more heat or carefully cut more stitches.
6.5. Protect the Fabric
Use wax paper or a thin cloth to protect the fabric when applying heat to iron-on patches. This will prevent the iron from directly contacting the fabric and causing damage.
7. Tips for Removing Stubborn Adhesive Residue
Even after successfully removing a patch, you may be left with stubborn adhesive residue. Here are some tips for removing it:
7.1. Use an Adhesive Remover
Apply a small amount of adhesive remover (such as Goo Gone) to a clean cloth and gently rub the residue. Follow the product instructions and test it on an inconspicuous area first.
7.2. Ironing Method
Place a clean cloth over the residue and press a warm iron over it for a few seconds. The heat can help soften the adhesive, making it easier to wipe away.
7.3. Freezing Method
Place the garment in the freezer for 30 minutes. The cold can make the adhesive brittle, allowing you to scrape it off more easily.
7.4. Washing and Drying
After applying any removal method, wash the garment according to its care instructions. This will help remove any remaining residue and cleaning solution. Avoid drying the garment on high heat until you are sure all the residue is gone, as heat can set the residue.
8. Repairing Minor Damage After Patch Removal
Even with the best techniques, minor damage can sometimes occur during patch removal. Here are some ways to repair it:
8.1. Mending Small Holes
If you accidentally create small holes, you can mend them using a needle and thread. Choose a thread color that matches the fabric and carefully stitch the hole closed.
8.2. Covering Marks with New Patches
If the patch leaves a noticeable mark or discoloration, you can cover it with a new patch. This is a great way to update the look of your uniform while concealing any imperfections.
8.3. Professional Alterations
For more significant damage, consider taking the garment to a professional tailor or seamstress. They can repair the damage or offer solutions such as replacing the damaged section of fabric.
9. Choosing the Right New Patches for Your Uniform
Once you’ve successfully removed the old patch, it’s time to consider adding a new one. Choosing the right patch can enhance the look of your uniform and promote your brand or organization. Onlineuniforms.net offers a variety of custom patch options, including:
9.1. Embroidered Patches
Embroidered patches are a classic choice, offering a high-quality, textured look. They are ideal for logos, names, and other designs.
9.2. Woven Patches
Woven patches are perfect for intricate designs and fine details. They offer a smooth, flat surface and are ideal for complex logos and artwork.
9.3. Printed Patches
Printed patches allow for full-color designs and photographic images. They are a great option for patches with gradients, fine lines, or complex color schemes.
9.4. Custom Shapes and Sizes
Onlineuniforms.net can create patches in any shape or size to perfectly match your design and uniform.
10. Customizing Your Uniforms with Onlineuniforms.net
At onlineuniforms.net, we understand the importance of professional and well-maintained uniforms. Whether you need to remove old patches or add new ones, we offer the services and products you need to keep your uniforms looking their best.
10.1. Wide Selection of Uniforms
We offer a wide selection of uniforms for various industries, including medical, hospitality, and corporate. Our uniforms are made from high-quality materials and are designed to be durable and comfortable.
10.2. Custom Embroidery and Printing
We offer custom embroidery and printing services to add your logo, name, or other designs to your uniforms. Our state-of-the-art equipment and skilled team ensure that your designs are accurately and professionally applied.
10.3. Easy Online Ordering
Our user-friendly website makes it easy to browse our selection, customize your uniforms, and place your order. We offer fast and reliable shipping to ensure that you receive your uniforms on time.
10.4. Expert Customer Support
Our expert customer support team is available to answer any questions you may have and assist you with your order. We are committed to providing excellent customer service and ensuring your satisfaction.
11. Real-Life Examples of Successful Patch Removal
To illustrate the effectiveness of these techniques, here are a few real-life examples:
11.1. Medical Scrubs
A hospital needed to remove old department patches from their medical scrubs and replace them with new ones reflecting the hospital’s updated branding. By carefully using a seam ripper to remove the old patches and then applying new embroidered patches from onlineuniforms.net, they were able to update their uniforms without damaging the fabric.
11.2. Restaurant Uniforms
A restaurant chain wanted to update the uniforms of its staff with a new logo. The old uniforms had iron-on patches that were difficult to remove. By applying heat with an iron and using an adhesive remover to clean up the residue, they successfully removed the old patches and added new printed patches from onlineuniforms.net.
11.3. School Uniforms
A school needed to remove patches from student uniforms that were no longer relevant. By following the steps outlined above, parents were able to remove the patches and keep the uniforms in good condition for future use.
12. Staying Updated with Uniform Trends and Innovations
The uniform industry is constantly evolving, with new trends and innovations emerging regularly. Staying updated with these changes can help you make informed decisions about your uniform program.
12.1. Sustainable Fabrics
Many companies are now offering uniforms made from sustainable fabrics, such as recycled polyester and organic cotton. These fabrics are not only environmentally friendly but also durable and comfortable.
12.2. Enhanced Comfort and Functionality
New technologies are being used to enhance the comfort and functionality of uniforms. This includes moisture-wicking fabrics, breathable designs, and ergonomic features.
12.3. Customization Options
Customization options are becoming increasingly popular, allowing companies to create unique and branded uniforms. This includes custom embroidery, printing, and patch designs.
12.4. Smart Uniforms
Smart uniforms incorporate technology to improve safety, communication, and productivity. This includes features such as GPS tracking, biometric sensors, and integrated communication devices.
13. FAQ: Common Questions About Uniform Patch Removal
Here are some frequently asked questions about removing uniform patches:
13.1. Can I remove a patch without damaging the fabric?
Yes, with the right tools and techniques, you can remove a patch without damaging the fabric. The key is to work slowly and carefully and use the appropriate removal method for the type of patch attachment.
13.2. What is the best way to remove adhesive residue?
The best way to remove adhesive residue is to use an adhesive remover, such as Goo Gone. Apply a small amount to a clean cloth and gently rub the residue.
13.3. How do I remove a patch that is both sewn and ironed on?
Start by removing the stitches with a seam ripper and then apply heat to soften the adhesive before peeling off the patch.
13.4. Can I reuse a patch after removing it?
Yes, you can reuse a patch after removing it, as long as it is in good condition. You may need to apply new adhesive or sew it onto the new garment.
13.5. What should I do if I accidentally damage the fabric?
If you accidentally damage the fabric, you can try to mend it with a needle and thread or take the garment to a professional tailor or seamstress.
13.6. How can I prevent damage during patch removal?
To prevent damage, use the right tools, work slowly and carefully, test heat sensitivity, avoid pulling forcefully, and protect the fabric with wax paper or a thin cloth.
13.7. What are the best materials for uniform patches?
The best materials for uniform patches include embroidered, woven, and printed fabrics. The choice depends on the design and desired look.
13.8. How can I customize my uniforms with patches?
You can customize your uniforms with patches by adding logos, names, or other designs. Onlineuniforms.net offers a variety of custom patch options to suit your needs.
13.9. What is the difference between embroidered, woven, and printed patches?
Embroidered patches have a textured look, woven patches have a smooth, flat surface, and printed patches allow for full-color designs and photographic images.
13.10. Where can I buy high-quality uniform patches?
You can buy high-quality uniform patches at onlineuniforms.net. We offer a wide selection of custom patch options and expert customer support.
14. Conclusion: Ensuring Your Uniforms Look Their Best
Removing uniform patches can seem daunting, but with the right tools and techniques, it’s a manageable task. Whether you’re dealing with sewn-on or iron-on patches, following these steps will help you remove them without damaging your garments. And when it’s time to add new patches, onlineuniforms.net is your go-to source for high-quality, custom options.
At onlineuniforms.net, we are committed to providing you with the best uniforms and customization services. Our wide selection, expert customer support, and easy online ordering make it simple to keep your uniforms looking professional and well-maintained. We proudly serve businesses, schools, and organizations across the USA, including Dallas, ensuring everyone has access to top-quality uniforms and custom apparel solutions.
Ready to Customize Your Uniforms?
Visit onlineuniforms.net today to explore our wide range of uniforms and custom patch options. Contact us for a free quote and let our expert team help you create the perfect look for your team or organization.
Address: 1515 Commerce St, Dallas, TX 75201, United States
Phone: +1 (214) 651-8600
Website: onlineuniforms.net